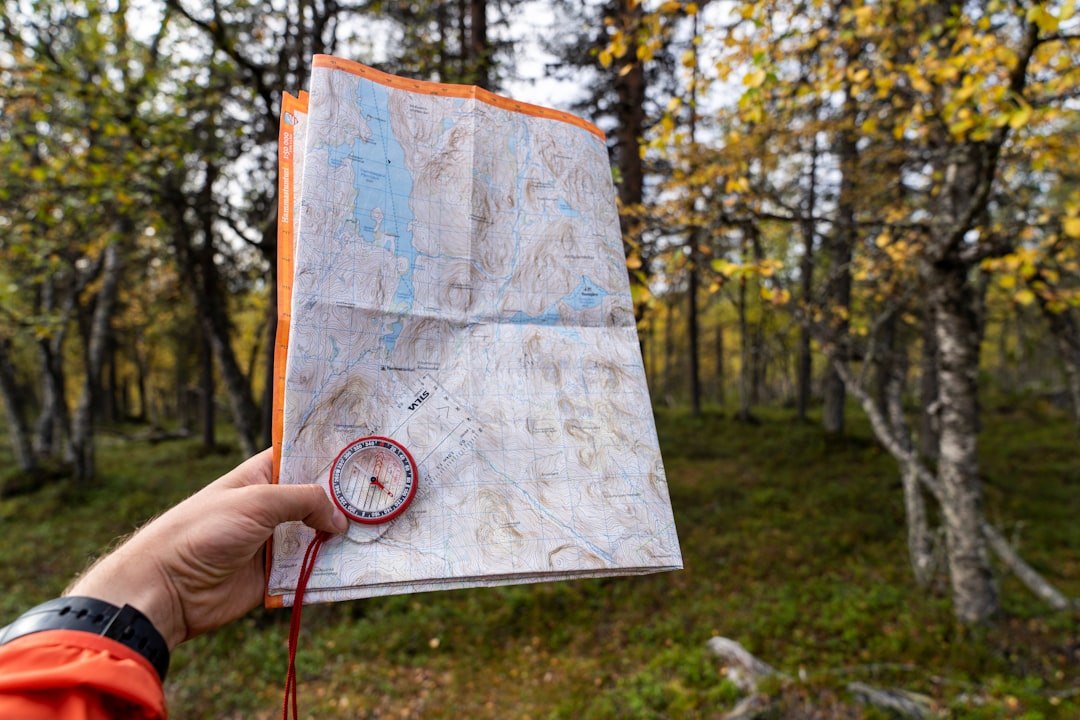
🧰 Tools & Gear You’ll Need
- Baseplate compass with a rotating bezel, orienting arrow, and degree markings
- Topographic map of the area you intend to navigate
- Declination adjustment tool or knowledge of local magnetic declination
- Land navigation book or resources for reference
- Pen or pencil for marking the map
- Optional: GPS device or smartphone with mapping app for cross-referencing
- Optional: Protractor for precise bearing drawing on the map
Mastering land navigation with a compass is a fundamental skill for any outdoor enthusiast, whether you’re embarking on a day hike, a multi-day backpacking trip, or simply want to enhance your preparedness. This comprehensive guide provides a step-by-step approach to using your compass effectively, ensuring you can confidently find your way in varied terrain and conditions.
Understanding Your Compass: The Foundation of Land Navigation
What is a Compass and How Does it Work?
A compass is an essential tool that utilizes the Earth’s magnetic field to indicate direction. At its core is a magnetized needle that, when allowed to pivot freely, aligns itself with the planet’s magnetic poles. This magnetic force is what guides the needle, pointing it towards magnetic north.
Types of Compasses for Land Navigation (Baseplate, Lensatic, etc.)
Several types of compasses are suited for land navigation. The most common for hikers and backpackers is the baseplate compass. It features a clear baseplate with a ruler edge and a rotating bezel containing a liquid-filled capsule with the magnetic needle. Another type is the lensatic compass, often favored by military personnel, which has a sighting lens for precise aiming and a more robust construction.
Essential Compass Parts and Their Functions
Understanding the parts of your compass is crucial for accurate use. The baseplate provides a stable platform and often includes rulers. The magnetic needle points towards magnetic north. The orienting arrow, usually etched inside the rotating bezel, is used to align the compass with the map. The rotating bezel (or dial) is marked with degrees from 0 to 360, allowing you to set and read bearings. Many compasses also feature a magnifying lens for detailed map reading.
Mastering Basic Compass Skills for Land Navigation
How to Hold a Compass Correctly for Accurate Readings
To ensure an accurate reading, hold your compass level and away from any metallic objects that could interfere with the magnetic needle. Your body should be still, and the compass should be positioned in front of you at waist or chest height, parallel to the ground. This stability allows the needle to move freely and point to magnetic north without obstruction.
Orienting the Compass: Aligning the Needle and Orienting Arrow
Orienting the compass involves aligning the magnetic needle with the orienting arrow inside the compass housing. Once the compass is held level and the needle is pointing towards magnetic north, you rotate the bezel until the north end of the needle is inside the orienting arrow. This aligns the compass with magnetic north, making it ready for map work or taking bearings.
Reading Bearings and Degrees: The Language of Navigation
Bearings are read in degrees, measured clockwise from North (0° or 360°). A bearing of 90° is due East, 180° is due South, and 270° is due West. Your compass bezel is marked with these degree increments. To read a bearing, you observe where the direction of travel line on the baseplate or the edge of the compass points in relation to the degree markings on the bezel.
Navigating with a Map and Compass: Setting and Following a Bearing
How to Set a Bearing From a Map to Your Destination
To set a bearing from a map, place the edge of your compass baseplate along the line connecting your current location to your destination on the map. Ensure the direction of travel arrow on the baseplate points towards your destination. Next, rotate the bezel until the orienting lines on the bezel are parallel to the North-South grid lines on the map, with the orienting arrow pointing to “N” (North) on the bezel. The degree marking now aligned with the direction of travel arrow is your bearing.
Converting Grid North to Magnetic North
Maps are typically oriented to Grid North, while compasses point to Magnetic North. The difference between these is called magnetic declination, which varies by location and over time. You’ll find the local declination information printed on most topographic maps. To convert Grid North to Magnetic North for taking a bearing from the map, you either add or subtract the declination value as indicated on the map. Many modern compasses have adjustable declination settings to simplify this process.
How to Follow a Bearing in the Field: Step-by-Step
Once you have a bearing from your map, hold the compass level and rotate your body until the north end of the magnetic needle is aligned within the orienting arrow on the bezel. The direction of travel arrow on the baseplate now indicates the direction you need to walk. Pick a distinct landmark in that direction and walk towards it. Once you reach the landmark, repeat the process: take a new bearing from the compass, find the next landmark, and continue.
Using Landmarks to Stay on Course
Regularly identify prominent landmarks (trees, rock formations, hilltops) along your intended bearing. Walking directly from one landmark to the next is more efficient and accurate than trying to maintain a precise bearing over long distances, especially in varied terrain. This technique is known as “leapfrogging” landmarks.
Advanced Land Navigation Techniques with a Compass
Taking a Bearing from a Landmark to Determine Your Location
If you are unsure of your position, you can take bearings to known landmarks visible in the distance. Identify two or three distinct features on the landscape and take a magnetic bearing to each. Then, on your map, draw a line from each landmark back towards your approximate location using the reciprocal bearing (the bearing 180 degrees opposite of the one you took). Where these lines intersect on the map is an approximation of your location.
Calculating and Following a Reverse Bearing for Backtracking
To backtrack along a path you’ve taken, you need to use the reverse bearing. If your original bearing was, for example, 120°, the reverse bearing is 120° + 180° = 300°. If the sum exceeds 360°, subtract 360°. Hold your compass, set it to the reverse bearing, and follow the direction of travel arrow. This ensures you are retracing your steps accurately.
Navigating Around Obstacles (Rivers, Cliffs, Dense Vegetation)
When faced with an impassable obstacle, you can use offset techniques. For example, to bypass a wide river, you might walk perpendicular to the river’s flow for a set distance (e.g., 100 paces), then walk parallel to the river until you are past it, and finally walk back the same perpendicular distance to rejoin your original line of travel. Precise measurement of distances and accurate bearings are key.
Techniques for Low Visibility Navigation (Fog, Night)
In fog or darkness, navigation becomes more challenging. Relying solely on visual landmarks is impossible. Use your compass to maintain a precise bearing, and pay close attention to pacing to estimate distances. Using a headlamp with a red light can help preserve night vision. If possible, use contour lines on your map to interpret the terrain even when you can’t see it clearly. Travel in small increments, constantly checking your bearing and pacing.
Common Mistakes and How to Avoid Them in Land Navigation
Avoiding Magnetic Interference
Keep your compass away from metal objects such as knives, keys, belt buckles, zippers, and electronic devices like phones and GPS units. These can create localized magnetic fields that deflect the compass needle, leading to inaccurate readings.
Maintaining Compass Level and Accuracy
The compass needle must be able to pivot freely to align with magnetic north. Holding the compass level is critical. Tilting it can cause the needle to drag or stick, resulting in false bearings. Ensure the needle is not catching on the housing.
Differentiating True North, Magnetic North, and Grid North
True North: The geographic North Pole.
Magnetic North: The direction the compass needle points, influenced by the Earth’s magnetic field.
Grid North: The direction of the north-south grid lines on a map.
Understanding and correctly applying declination (the difference between Magnetic North and True North, or between Magnetic North and Grid North, depending on the map’s projection) is essential for accurate map-to-ground navigation.
Overcoming User Errors and Misinterpretations
Double-check your bearings, especially after making adjustments or when transferring them between map and field. Ensure you are reading the correct degree marking and that the orienting arrow is properly aligned. Practice regularly to build confidence and reduce the likelihood of simple mistakes.
Practical Application: Real-World Scenarios for Compass Navigation
Compass navigation skills are invaluable across a range of outdoor activities.
Day Hiking and Trail Finding
For day hikes, a compass and map can help you stay oriented, find shortcuts, or navigate back to the trailhead if you stray from marked paths. It’s an essential safety tool even on well-maintained trails.
Backpacking and Wilderness Exploration
On multi-day trips in remote areas, a compass is indispensable for planning routes, following ridgelines, crossing valleys, and ensuring you reach designated campsites. It complements GPS devices by providing a reliable, power-independent navigation method.
Emergency Preparedness and Survival Situations
In a survival scenario where electronic devices may fail, a compass and map become your primary means of navigation. Knowing how to use them could be critical for self-rescue or finding essential resources.
Choosing the Right Compass and Essential Gear for Land Navigation
Selecting the appropriate compass and companion gear can significantly impact your navigation experience.
Key Features to Look for in an Outdoor Navigation Compass
Opt for a baseplate compass with a clear, durable baseplate, a magnifying lens for map detail, luminous markings for low-light conditions, and an adjustable declination feature. A rotating bezel with clear degree markings is also crucial. Ensure the needle is well-balanced and moves freely.
Recommended Companion Gear for Effective Land Navigation
Always carry a topographic map of your intended area, and know how to read it. A GPS device or smartphone with offline maps can serve as a valuable backup and cross-referencing tool. A notebook and pencil for recording notes and bearings, and knowledge of basic pacing techniques, are also highly recommended.
Frequently Asked Questions About Compass Land Navigation
How Often Should I Check My Bearing?
This depends on the terrain and your confidence in your location. In complex terrain or poor visibility, check your bearing frequently, perhaps every 10-15 minutes or after covering a short distance. In open, familiar terrain, less frequent checks might suffice, but it’s good practice to reconfirm your direction periodically.
What’s the Difference Between Azimuth and Bearing?
In land navigation, the terms “azimuth” and “bearing” are often used interchangeably. Both refer to an angle, measured in degrees clockwise from North, used to indicate direction. Typically, an azimuth is measured from 0° to 360°, with 0° being North. A bearing can sometimes be expressed in relation to North or South, followed by an angle and then East or West (e.g., N45°E), but in practice, especially with compasses, it functions the same as a 0-360° azimuth.
Can I Use My Phone’s Compass for Land Navigation?
Smartphone compass apps can be useful for basic orientation, especially when paired with digital maps. However, they are generally less reliable than a dedicated baseplate compass. Their accuracy can be affected by the phone’s internal sensors, software, and proximity to other electronics. Furthermore, relying solely on a phone drains its battery, which is a critical concern in the outdoors. A dedicated compass should always be your primary tool, with a phone app serving as a backup or supplementary aid.