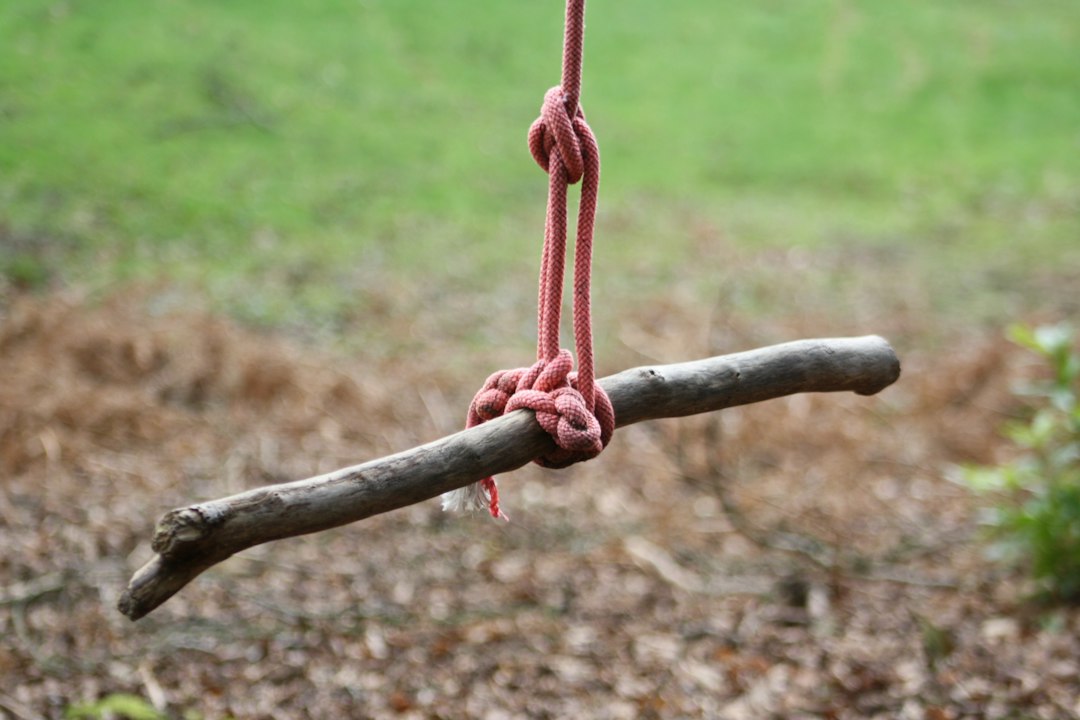
🧰 Tools & Gear You’ll Need
- Approximately 50-100 feet of durable cordage (e.g., 550 paracord, dynamic or static climbing rope for specific applications)
- A sharp knife or multi-tool for cutting cordage
- Optional: Carabiners, prusik loops, extra cordage for practice
The Crucial Role of Essential Knots for Camping in Outdoor Adventures
In the realm of outdoor pursuits, few skills are as fundamental and universally applicable as mastering essential knots. Whether you’re pitching a tent, setting up a tarp shelter, securing gear, or facing an unexpected emergency, the ability to tie reliable knots can be the difference between a comfortable, safe excursion and a frustrating, potentially hazardous situation. Knots are the silent workhorses of camping, enabling us to connect, secure, and adapt our equipment to the environment. They are the fundamental building blocks for countless backcountry tasks, transforming simple lengths of rope into critical tools for survival and comfort.
Why Mastering Camping Knots is Non-Negotiable for Safety and Efficiency
The wilderness is unpredictable, and robust knot-tying skills are a cornerstone of self-reliance. A well-tied knot provides secure anchors, stable lashings, and reliable connections that can withstand the stresses of wind, rain, and load. For instance, a poorly tied ridgeline for a tarp can collapse in a downpour, leaving you exposed. Similarly, an improperly secured bear bag can fail, resulting in lost food and a potential wildlife encounter. Beyond safety, efficient knot-tying saves precious time and energy, allowing you to focus more on enjoying your adventure and less on wrestling with your gear. Understanding the strengths and limitations of different knots ensures you select the most appropriate one for the task, optimizing performance and preventing gear failure.
Understanding Knot Terminology: Standing End, Working End, and Bight
Before diving into specific knots, it’s essential to understand the basic terminology that describes the parts of a rope when tying. The standing end is the longer, inactive part of the rope, often secured to an anchor or simply resting. The working end is the shorter, active part of the rope that you manipulate to form the knot. A bight is formed when the rope is turned back on itself, creating a U-shape without crossing the sides. Understanding these terms is crucial for following instructions and correctly executing knots. Many knot failures occur due to misinterpreting which end of the rope is which or how to create the necessary bends and loops.
Selecting the Right Cordage: Paracord, Dyneema, and Beyond for Camping Knots
The type of cordage you use significantly impacts knot performance. 550 paracord is a popular choice for camping due to its versatility, strength, and internal strands that can be used for finer tasks like fishing lines or sewing repairs. However, its softer, fibrous nature can sometimes lead to slippage in certain knots, especially when wet. Dyneema or UHMWPE ropes are incredibly strong, lightweight, and have low stretch, making them excellent for applications like ridgelines or guy lines where minimal sag is desired. Their slick surface, however, means they can be prone to slipping in knots and often require specialized knots or hitches (like the double fisherman’s knot or specific friction hitches) for secure fastening. For general camping, a good quality nylon or polyester rope with a diameter between 3mm and 6mm offers a balance of durability, ease of handling, and knot security.
How to Tie Essential Knots for Camping: Your Top 7 Must-Know Knots
While a vast array of knots exists, a select few form the backbone of essential camping applications. Mastering these seven knots will equip you to handle the majority of common backcountry scenarios with confidence and efficiency.
The Bowline: Creating a Fixed Loop for Reliable Anchoring
The Bowline is renowned for its ability to create a secure, fixed loop at the end of a rope that will not slip or tighten under load. It’s indispensable for tasks such as tying a rope to a tree, creating a clothesline, or forming a secure attachment point on a pack.
The Taut-Line Hitch: Achieving Adjustable Tension for Guy Lines
This adjustable loop hitch is critical for tensioning guy lines on tents and tarps. It allows you to easily tighten or loosen the line by sliding the knot along the standing end, ensuring your shelter remains taut and stable in varying wind conditions.
The Trucker’s Hitch: The Ultimate Knot for Securing Tarps and Loads
The Trucker’s Hitch is a compound knot system that provides significant mechanical advantage, allowing you to cinch down tarps, secure loads on a vehicle, or create a tight ridgeline with minimal effort. It combines a fixed loop, a slipped knot, and a tensioning loop.
The Square Knot: A Simple Knot for Joining Ropes of Equal Diameter
Also known as the Reef Knot, the Square Knot is straightforward to tie and is primarily used for joining two ropes of the same diameter. It’s effective for tying bundles of gear or securing bandages, but it’s crucial to understand its limitations, particularly under heavy or inconsistent load, where it can slip.
Two Half Hitches: A Versatile Knot for Quick Attachments
This is a simple and fast knot for temporarily securing a rope to a post, rail, or tree. It’s not as secure as some other hitches, but its ease of tying and untying makes it invaluable for quick, non-critical attachments.
The Clove Hitch: Fastening to Posts and Rails with Ease
The Clove Hitch is excellent for quickly securing a rope to a cylindrical object like a post, rail, or carabiner. It’s easily adjustable and can be tied and untied rapidly, making it ideal for temporary mooring or securing items.
The Sheet Bend: Efficiently Joining Ropes of Different Sizes
When you need to connect two ropes of significantly different diameters or materials, the Sheet Bend is the knot of choice. It provides a secure join that is less prone to slipping than a Square Knot when rope sizes differ.
Step-by-Step Instructions: How to Tie Essential Knots for Camping with Confidence
Detailed, precise instructions are key to mastering these knots. Follow these steps carefully, and practice until the motions become second nature.
Tying the Bowline Knot: A Visual Guide
Form the initial loop
Take the standing end of your rope and form a small loop (sometimes called the “rabbit hole”) in the standing part, with the working end of the rope coming up from underneath the loop. Ensure the working end is on the side of the standing end that will go around the object.
Bring the working end up through the loop
Pass the working end up through the small loop you just created. Imagine the working end as a rabbit coming out of its hole.
Pass the working end around the standing end
Next, the “rabbit” goes around the “tree” (the standing end of the rope). Wrap the working end around the standing end.
Return the working end down through the loop
Finally, the “rabbit” goes back down into the “hole.” Pass the working end back down through the initial small loop.
Dress and set the knot
Grasp the standing end and the two parts of the loop with one hand. With the other hand, pull the working end to tighten the knot. Ensure the knot is snug and neat, with the turns lying flat. The final knot should create a secure loop that does not constrict the standing part.

Tying the Taut-Line Hitch Knot: Precision and Tension
Form the first turn
Pass the working end around the object (e.g., tent stake or tree) once, bringing it back alongside the standing end.
Form the second turn
Cross over the standing end and make a second turn around the object, lying parallel to the first turn but in the opposite direction.
Complete the hitch
Bring the working end over both the standing end and the previous turns, tucking it underneath itself to create a locking turn. This final turn cinches down on the preceding turns.
Dress and adjust
Pull the standing end and the working end to snug up the knot. The Taut-Line Hitch can then be slid up or down the standing end to adjust tension. To tighten, pull the standing end away from the object. To loosen, pull the knot itself towards the object.
Tying the Trucker’s Hitch Knot: Maximizing Leverage
Create a fixed loop
Tie a Bowline knot (or another secure fixed loop, like a figure-eight loop) near the end of the rope that will be used for tensioning. This loop will be the anchor point.
Form the pulley system
Pass the working end through your fixed loop. Then, pass it around the object you are securing (e.g., a tarp grommet, a load). Bring the working end back towards the fixed loop.
Create the slip knot
Create a slipped knot (like a Half Hitch or a simple overhand loop) using the working end, with the rope running through the fixed loop you created earlier. This forms the “pulley” that provides mechanical advantage.
Tension the line
Pull the working end firmly to tighten the slip knot and engage the mechanical advantage. You’ll feel the tension increase significantly. Once you have achieved the desired tension, tie off the working end securely with a few Half Hitches around the standing part of the rope.
Tying the Square Knot: A Secure Join
First tie
Take the two ends of the ropes you want to join. Cross the right end over the left end and tuck it underneath, pulling snug. This creates a simple overhand knot.
Second tie
Now, take the end that is currently on the left (which was originally the right end) and cross it over the end that is currently on the right (originally the left end). Tuck it underneath and pull snug.
Check the knot
A correctly tied Square Knot will have both working ends emerging from the same side of the knot, parallel to their standing parts. If the ends emerge on opposite sides, you have tied a Granny Knot, which is much less secure and prone to slipping.
Tying Two Half Hitches: Simple and Effective
First half hitch
Pass the working end around the object (e.g., a post or tree) and then bring it back over the standing end.
Second half hitch
Pass the working end around the object a second time, in the same direction as the first pass, and then tuck it underneath itself, through the loop formed by the second wrap. Pull the working end tight against the standing end.
Tying the Clove Hitch: Rapid Attachment
First turn
Pass the working end around the post or rail. Bring it back across the standing end.
Second turn
Pass the working end around the post again, directly next to the first turn but on the other side of the standing end. Bring it over the standing end.
Lock the hitch
Tuck the working end under the second turn, emerging alongside the standing end. Pull both ends to tighten.

Tying the Sheet Bend Knot: Joining Unlike Ropes
Form a bight
Take the working end of the larger rope and form a bight. Pass the working end of the smaller rope up through this bight.
Wrap and tuck
Wrap the working end of the smaller rope around both parts of the larger rope’s bight, going behind them. Then, tuck the working end of the smaller rope under itself, emerging alongside its standing end.
Dress and set
Pull both standing ends to tighten the knot. The Sheet Bend should look like two interlocking loops. It’s crucial that the working ends are on the same side of the knot.
Real-World Applications: How to Tie Essential Knots for Camping in Specific Scenarios
Knowing how to tie knots is one thing; applying them effectively in a camping context is where the real skill lies. Here’s how these essential knots translate to practical, on-the-ground solutions.
Essential Knots for Pitching Tents Securely
The Taut-Line Hitch is your primary tool for tensioning tent guylines. By attaching the guyline to the tent stake with a Taut-Line Hitch, you can easily adjust the tension to keep your tent taut, preventing flapping in the wind and ensuring water runs off effectively. The Bowline can be used to create a secure loop on the end of a ridgeline for attaching to tent poles or trees.
Best Knots for Rigging Tarps and Creating Shelters
The Trucker’s Hitch is indispensable for creating a taut ridgeline between two trees or anchor points for a tarp. It allows you to achieve significant tension, essential for a waterproof and stable shelter. For attaching tarp corners to stakes or trees, a Clove Hitch or Two Half Hitches can be used for quick, secure connections, especially if the tarp grommets are reinforced. A Bowline can create a fixed loop on the ridgeline itself.
How to Tie Knots for Hanging Hammocks Safely
While specialized hammock suspension systems exist, basic knots can also be employed. A Bowline knot is excellent for creating a secure loop around a tree that won’t damage the bark (especially when used with a tree-saver strap). For adjustable suspension, a Taut-Line Hitch can be tied onto the main suspension line to allow for easy height and tension adjustments. Alternatively, some hammock users employ friction hitches like the Prusik knot for adjustability.
Using Knots to Secure Gear and Hang Food Away from Critters
When packing out gear or securing items in your vehicle, a Square Knot can be useful for bundling, though care must be taken. For more robust security, the Trucker’s Hitch can be used to lash down bulky items on a pack frame or roof rack. Hanging food bags away from bears and rodents is a critical safety practice. A Bowline can create the loop for attaching the bag to the rope, and a series of secure knots like a Modified Taut-Line Hitch or a simple overhand knot can be used to hoist the bag high between trees. The Sheet Bend might be needed if you have to join two pieces of rope together to reach the desired height.
Essential Knots for Emergency Repairs on the Trail
In a pinch, a Square Knot can temporarily fix a broken strap or join two broken pieces of cordage (use with extreme caution and only for non-critical loads). Two Half Hitches are useful for quickly securing a splint or fashioning a temporary repair to a backpack strap. The Bowline can create a makeshift handle or attachment point on damaged gear.
Avoiding Pitfalls: How to Tie Essential Knots for Camping Without Common Mistakes
Even the best knots can fail if tied incorrectly or used inappropriately. Awareness of common mistakes and best practices is crucial for reliability.
Identifying and Preventing Knot Slippage and Failure
Knot slippage often occurs when the wrong knot is chosen for the rope type (e.g., using a Square Knot on slippery synthetic ropes) or when the knot is not properly dressed and set. Always ensure your knots are snug and that the working end is secured appropriately. For critical loads, test the knot by applying significant force before fully committing. Learn to recognize when a knot is inappropriate for the materials or load.
The Art of Dressing and Setting Your Knots for Maximum Strength
Dressing a knot means arranging all the parts of the rope neatly and correctly within the knot structure. A well-dressed knot lies flat, without unnecessary twists or crossing of the strands, which distributes the load evenly. Setting the knot involves pulling all parts of the knot taut to its designed snugness. Both dressing and setting are critical for ensuring the knot performs to its full strength and is less likely to slip or jam.
When to Re-tie: Recognizing Worn or Compromised Knots
Ropes and knots degrade over time due to abrasion, UV exposure, and repeated loading. Regularly inspect your cordage for fraying, cuts, or discoloration. Similarly, knots that have been heavily loaded, especially if they became jammed, should be carefully inspected. If a knot looks distorted, worn, or has been subjected to excessive force, it’s best practice to retie it with fresh cordage or a different, more appropriate knot.
Practical Knot-Testing Techniques Before Relying on Them
Before trusting a knot with your safety or valuable gear, give it a test. For tensioning knots like the Taut-Line Hitch or Trucker’s Hitch, pull hard on the system to ensure it holds. For critical anchor points, like in a rescue scenario or when hanging a heavy load, apply steady, increasing force. Observe how the knot behaves; does it shift, tighten, or show signs of strain? If in doubt, re-tie or use a more robust knot.
Adapting Your Skills: How to Tie Essential Knots for Camping in Challenging Conditions
The backcountry doesn’t always offer ideal conditions. Cold, wet, or dark environments can make knot-tying significantly more difficult.
Tying Knots with Cold Hands or Gloves On
Cold weather is a major adversary to fine motor skills. When wearing gloves, dexterity is reduced. Practice tying essential knots repeatedly until you can perform them by feel alone. Consider using gloves with finger grips or dexterity-focused designs. For extremely cold conditions, sometimes removing gloves for a short period to tie a critical knot can be necessary, though this carries its own risks of frostbite.
Dealing with Wet, Muddy, or Slippery Rope and Knots
Wet synthetic ropes become significantly more slippery, increasing the risk of knot failure. Knots tied with wet rope may also jam tighter and be harder to untie. In these conditions, opt for knots that have inherent security, like the Bowline or a well-tied Taut-Line Hitch, and ensure they are dressed and set meticulously. Avoid knots like the Square Knot if possible. It may be necessary to dry ropes thoroughly after use to prevent rot and make future knot-tying easier.
Maintaining Dexterity: Knots for Low-Light or Nighttime Situations
Tying knots in the dark requires muscle memory and familiarity. Practice tying knots in low light conditions using a headlamp. Focus on tactile cues: the feel of the rope, the shape of the loops, and the way the strands interlock. Knots that are simple and have distinct tying steps, like the Bowline or Two Half Hitches, are generally easier to tie by feel than complex knots.
Overcoming Rope Stiffness and Length Limitations
New or stiff ropes can be difficult to manipulate. Flexible ropes are easier to knot. If your rope is stiff, try working it between your hands to soften it. If you are short on rope length, consider using knots that are more efficient in their use of material, or look for ways to extend your reach, such as joining ropes with a Sheet Bend (if appropriate for the load).
Maximizing Knot Performance: How to Tie Essential Knots for Camping with the Right Gear
The gear you choose directly influences how well your knots perform. Selecting the right cordage and understanding its properties is key.
Paracord vs. Static Rope vs. Dynamic Rope: Choosing Wisely for Knots
Paracord is versatile for general camping but can be slippery. Static ropes (like accessory cord or accessory cord slings) have very little stretch and are excellent for applications requiring minimal sag, such as tent ridgelines or clotheslines. They hold knots well. Dynamic ropes (climbing ropes) are designed to stretch and absorb impact; they are generally overkill for most camping tasks and can be harder to knot securely due to their sheath construction and inherent stretch.
How Rope Diameter Affects Knot Security and Ease of Tying
Thicker ropes are generally stronger but can be harder to manipulate and may require larger knots. Thinner ropes are easier to handle and form knots with, but some knots may not hold as securely, and they can cut into your hands under load. For most general camping purposes, ropes between 3mm and 6mm offer a good balance. Always ensure the knot you choose is appropriate for the diameter of your rope.
Useful Accessories to Enhance Your Knot-Tying Experience
A sharp knife or multi-tool is essential for cutting cordage cleanly. Carabiners can act as convenient anchor points or part of pulley systems. For serious hammock camping, dedicated suspension systems often eliminate the need for complex knot-tying on the tree. Practice ropes that are a different color from your main cordage can help visualize knot formation.
Proper Rope Storage for Quick Access to Camping Knots
Store your ropes loosely coiled in a dry, ventilated bag or stuff sack. Avoid storing them tightly wound or compressed for extended periods, as this can create kinks and make them harder to untie. Ensure your ropes are clean and dry before storage. Keeping essential lengths of cordage readily accessible in your pack or on your gear ensures you’re prepared when needed.
Becoming a Knot Master: How to Tie Essential Knots for Camping Faster Through Practice
Proficiency with knots comes with consistent practice. Treat learning knots like learning any other valuable skill.
Memorable Techniques: Using Mnemonics to Recall Camping Knots
Mnemonics are powerful tools for remembering knot-tying sequences. The “rabbit hole” analogy for the Bowline is a prime example. For the Square Knot, “right over left and under, then left over right and under” is effective. Create or find memory aids that resonate with you for each knot you learn.
Structured Practice Routines for Beginner Knot Tiers
Start by dedicating short, regular periods to practice. Focus on mastering one or two knots at a time. Tie them repeatedly until the process is fluid. Use diagrams or videos as a reference, but strive to eventually tie them without aid. Practice in different conditions – sitting, standing, even with light gloves on.
Daily Drills for Rapid Knot Proficiency
Incorporate knot practice into your daily routine. Can you tie a Bowline while waiting for coffee to brew? Can you tie a Taut-Line Hitch to secure a laundry bag? Even a few minutes a day, consistently applied, will build significant muscle memory and speed.
Building Muscle Memory for Effortless Knot Tying in the Field
Muscle memory is your goal. This is achieved through repetition until the movements become automatic. When you can tie a knot correctly without consciously thinking through each step, you’ve achieved true proficiency. This allows you to focus on other aspects of your camp setup or the surrounding environment, especially when time or conditions are challenging.
Quick Reference: How to Tie Essential Knots for Camping at a Glance
Here’s a concise summary of the best knots for common camping needs:
The Best Knot for a Permanent Loop in Camping Situations
Bowline Knot: Creates a fixed, non-slipping loop that is relatively easy to untie after being loaded.
The Best Knot for Adjustable Tensioning in Camping Setups
Taut-Line Hitch: Allows for easy adjustment of tension on guylines, tent lines, or clotheslines.
The Best Knot for Joining Two Ropes of Different Thicknesses
Sheet Bend: Efficiently and securely joins ropes of unequal diameters.
The Best Knot for Attaching a Rope to a Tree or Post
Clove Hitch (for quick, temporary attachment) or Two Half Hitches (for slightly more security). For a permanent loop around a tree, use a Bowline.
The Best Knot for Quick and Reliable Lashings
Trucker’s Hitch: Provides significant mechanical advantage for securing tarps, loads, or creating tight lines.
Frequently Asked Questions: Deep Dive into How to Tie Essential Knots for Camping
How Many Knots Are Truly Essential for a Beginner Camper?
For a beginner, mastering 3-5 core knots is highly beneficial: the Bowline, Taut-Line Hitch, Square Knot (with awareness of its limitations), Two Half Hitches, and Clove Hitch. Adding the Trucker’s Hitch and Sheet Bend soon after will cover most common needs.
Which Camping Knot Offers the Absolute Strongest Hold?
Strength is context-dependent. For creating a fixed loop that won’t slip, the Bowline is very strong and reliable. For tensioning, the Trucker’s Hitch system provides immense holding power. For joining ropes, the Double Sheet Bend is stronger than the single. However, “strongest” also implies “hardest to untie,” so balance is key.
Which Camping Knot is Easiest to Untie After Bearing Load?
Knots like the Bowline and Taut-Line Hitch are designed to be relatively easy to untie after bearing significant load, provided they are tied correctly. Knots like the Square Knot can jam tightly under load and become very difficult to release.
Can One Knot Suffice for All Camping Needs?
No single knot can effectively and safely serve all camping purposes. Different situations demand different knot characteristics—fixed loops, adjustable tension, secure joins, quick attachments, etc. A diverse knot repertoire is essential for preparedness and safety.
What is the Single Most Important Knot for a New Camper to Learn?
While subjective, the Bowline knot is often cited as the single most important knot for a beginner. Its ability to form a secure, fixed loop that doesn’t slip or constrict makes it incredibly versatile for anchoring, creating attachment points, and general utility.
Final Checklist: Mastering How to Tie Essential Knots for Camping
Equipping yourself with knot-tying skills is an investment in your safety and enjoyment of the outdoors. Use this checklist to gauge your readiness.
Your Personal Knot Mastery Scorecard for Camping Trips
Beginner (3-5 Knots): Can tie and use Bowline, Taut-Line Hitch, Square Knot, Two Half Hitches, Clove Hitch. Understands basic terminology.
Intermediate (5-7 Knots): Proficient with beginner knots. Can tie and apply Trucker’s Hitch, Sheet Bend. Understands rope types and knot limitations.
Advanced (7+ Knots): Mastered core knots. Can tie and apply specialized knots (e.g., Figure-Eight family, Prusik, Constrictor) and adapt knot choices to challenging conditions.
Matching Knots to Campsite Challenges: A Strategic Overview
Pitching a Tent: Taut-Line Hitch for guylines, Bowline for ridgelines.
Rigging a Tarp: Trucker’s Hitch for ridgeline, Clove Hitch/Two Half Hitches for stakes/anchors.
Hanging a Bear Bag: Bowline for loop, various hitches for hoisting.
Securing Gear: Trucker’s Hitch for lashings, Square Knot for bundling (use with caution).
Emergency Repairs: Two Half Hitches, Square Knot (temporary/low-load).