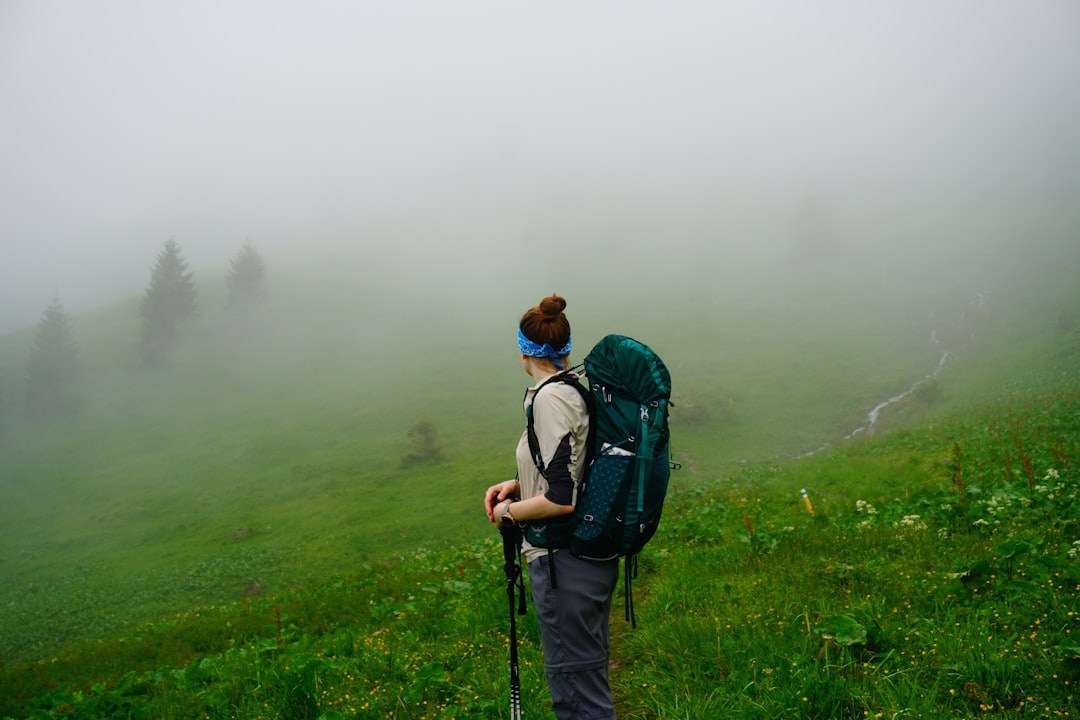
🧰 Tools & Gear You’ll Need
- Trekking poles (adjustable recommended)
- Appropriate hiking footwear
- Comfortable hiking attire
- Water and snacks
- Navigation tools (map, compass, GPS)
- First-aid kit
Understanding Trekking Poles for Downhill Hiking
Benefits of Using Trekking Poles on Descents
Trekking poles are invaluable tools for any hiker, but they particularly shine on descents. By distributing the load across your arms and upper body, they significantly reduce the impact on your knees, hips, and ankles. This not only helps prevent joint pain and fatigue but also enhances stability, reducing the risk of slips and falls on uneven or slippery terrain. They act as an extension of your body, providing crucial points of contact to maintain balance and control.

Key Differences: Downhill vs. Uphill vs. Flat Ground Pole Use
While the fundamental design of trekking poles remains the same, their application varies with terrain. On ascents, poles are typically extended slightly longer to aid propulsion and reduce strain on leg muscles. On flat ground, they assist with rhythm and momentum, often with a lighter, more passive use. Downhill, however, is where their shock-absorption and stability benefits are most pronounced. Poles are generally shorter, planted ahead of the foot to catch your weight, and used more actively to control speed and maintain balance.
Assessing Your Current Trekking Pole Setup for Downhill
Before embarking on a downhill trek, take a moment to inspect your poles. Ensure they are securely locked at their set length, with no signs of damage. Check the tips for wear and tear; worn tips can reduce grip on various surfaces. If your poles have straps, make sure they are adjusted for comfort and effectiveness, not so tight that they restrict blood flow, but snug enough to provide support.
Optimizing Trekking Pole Length for Downhill Hiking
The 90-Degree Elbow Rule: A Starting Point
A common starting point for setting trekking pole length is to have your elbows bent at approximately a 90-degree angle when the pole tips are resting on the ground and the poles are held in front of you. This provides a good baseline for comfortable and effective pole use on varied terrain.
Establish Baseline Pole Length
Hold the pole with the tip on the ground in front of you. Adjust the pole so that your elbow forms roughly a 90-degree angle. This is your starting point for neutral terrain.
Adjusting Pole Length for Downhill Inclines (Increase by 5-10 cm)
For descents, you will typically want to shorten your poles slightly compared to your uphill or flat-ground setting. This allows for a more natural arm swing and better control. A general guideline is to shorten them by about 5-10 cm from your 90-degree elbow setting. This brings the handles closer to your body, providing a more stable base and reducing the reach required for planting.
Shorten Poles for Downhill
On steep downhill sections, shorten your trekking poles by approximately 5 to 10 cm (2 to 4 inches) from your standard setting. This adjustment allows for a more compact and controlled pole plant.
Proper Adjustment Techniques for Twist-Lock and Lever-Lock Poles
Trekking poles come with two primary locking mechanisms: twist-locks and lever-locks. For twist-locks, ensure the internal mechanism is clean and tightened sufficiently; periodically check and re-tighten as they can loosen with use. Lever-lock poles are generally easier to adjust on the fly. Ensure the lever is firmly closed, providing a secure lock. Test the lock by applying pressure before relying on it.
Verifying Pole Height for Various Downhill Gradient
As the steepness of the downhill slope changes, so too should your pole length. For moderately steep sections, the slightly shortened setting should suffice. However, on very steep or technical terrain, you might find yourself adjusting them even shorter for maximum control and to prevent them from snagging. Always test your adjustment before fully committing your weight.
Mastering Hand Position and Grip for Downhill Stability
Effective Use of Wrist Straps on Descents
The wrist straps on your trekking poles are crucial for downhill stability. They allow you to transfer some of your weight through the poles without having to maintain a death grip. Slide your hands up through the straps from the bottom, so the strap rests on your wrist. When you push down, allow the strap to take some of the pressure, rather than squeezing the handle tightly.
Utilize Wrist Straps Correctly
Slide your hand up through the strap from below, so it rests across the palm and wrist. When pushing down, allow the strap to bear some of the load, reducing the need to grip the handle tightly. This conserves energy and prevents fatigue.
Grip Techniques for Enhanced Balance and Control
Maintain a relaxed but firm grip on the handles. Avoid clenching your fists, which can lead to hand and forearm fatigue. The goal is to guide the poles, not to hang onto them for dear life. Let the straps do some of the work. Your grip should be responsive, allowing you to quickly adjust pole placement as needed.
Maintaining a Relaxed Grip to Prevent Fatigue
Continuously check your grip throughout the descent. If you notice your hands are tense or your forearms are aching, consciously relax your grip. Shaking out your hands periodically can help alleviate tension. A relaxed grip is key to maintaining endurance on longer descents.

Avoiding Excessive Pressure on Wrists and Handles
Excessive pressure on the handles can transfer jarring shocks up your arms and into your shoulders. By using the wrist straps effectively and maintaining a slight bend in your elbows, you can better absorb these impacts. Think of the poles as shock absorbers that work in conjunction with your body.
Essential Techniques for Downhill Pole Planting
The Basic Downhill Planting Strategy (Ahead of the Foot)
On descents, the primary pole-planting strategy involves planting the poles slightly ahead of your leading foot. This provides a stable point of contact that helps you control your speed and catch yourself if you start to slip. The poles act as a brake and a balance aid, intercepting your forward momentum.
Plant Poles Ahead of Your Feet
On downhills, aim to plant your trekking poles slightly in front of your leading foot. This allows the poles to act as a stabilizing brace, helping to slow your descent and prevent you from pitching forward.
Synchronizing Pole Plants with Your Stride
Effective pole use is about rhythm. Aim to synchronize your pole plants with your stride. As you step forward with one foot, plant the pole on the opposite side slightly ahead of that foot. This creates a balanced, contralateral movement, similar to cross-country skiing or Nordic walking, which enhances stability and efficiency.
Maintaining a Slight Forward Body Lean
To enhance stability and control on downhills, maintain a slight forward lean from your hips. This shifts your center of gravity forward, over your feet, making it easier to control your momentum and use your poles effectively. Avoid leaning back, which can lead to instability and a greater risk of falling.
Lean Slightly Forward
Adopt a slight forward lean from your hips. This shifts your weight over your feet, improving balance and allowing your poles to be more effective in controlling your descent and absorbing impact.
Utilizing Poles to Absorb Impact and Maintain Rhythm
Each time you plant a pole, use it to absorb some of the shock from your downward movement. By allowing your arms and the poles to flex slightly, you dissipate the impact energy, reducing stress on your joints. This rhythmic absorption helps maintain a consistent pace and a smoother descent.
Advanced Downhill Techniques for Steep or Technical Terrain
The Double-Plant Technique for Steep Descents
On very steep or challenging sections, you may find it beneficial to use a “double plant.” This involves planting both poles simultaneously slightly ahead of your feet before taking your next step. This provides maximum stability and braking power when you need it most.
Employ Double-Planting on Steep Sections
When facing very steep terrain, use a double-plant technique. Plant both poles firmly in the ground ahead of you simultaneously before stepping down. This offers maximum stability and control.
Navigating Loose Surfaces (Scree, Gravel, Mud)
On loose surfaces like scree, gravel, or mud, pole tips can sink or slip. Plant your poles with a bit more deliberate force, but be aware that they may not provide as firm a grip. In scree, try to find firmer patches to plant. In mud, longer poles might provide better leverage.

Pole Placement on Uneven and Rocky Terrains
When navigating rocky terrain, use your poles to test the stability of the ground ahead or to brace yourself. Plant them in firm spots, avoiding small crevices where tips can get stuck. Use them to help you step over obstacles or maintain balance on shifting rocks.
Using Poles as Braces on Stairs and Switchbacks
On man-made stairs or natural rock steps, trekking poles can act as additional “legs.” Plant them firmly on the step below you to provide support and stability as you descend. On switchbacks, use the poles to help you pivot and maintain balance as you change direction.
Body Positioning for Effective Downhill Hiking with Poles
Maintaining Bent Knees for Shock Absorption
Just as important as using your poles is how you position your body. Keep your knees slightly bent at all times. This allows your legs to act as natural shock absorbers, working in tandem with your poles to cushion the impact of each step.
Keep Knees Bent
Maintain a slight bend in your knees throughout the descent. This allows your leg muscles to absorb impact effectively, working in synergy with your trekking poles to protect your joints.
Foot Placement Strategies for Optimal Control
Focus on placing your feet deliberately and with control. Take shorter steps than you might on flat ground. Aim to land with your foot relatively flat, rather than striking hard with your heel, which can send jarring impacts up your leg. Use your poles to help you balance as you place each foot.
Avoiding Leaning Backwards on Steep Slopes
Leaning backward on steep slopes is a common mistake that leads to instability and increases the risk of falling. Instead, lean slightly forward from the hips, keep your weight over your feet, and use your poles to maintain balance and control your descent.
Engaging Core and Hip Muscles for Stability
A strong core and stable hips are crucial for downhill hiking. Engage these muscles to maintain an upright but athletic posture. This provides a solid base for your movements and allows you to react effectively to changes in terrain, using your poles for fine-tuning balance.
Common Mistakes to Avoid When Using Trekking Poles Downhill
Pole Length Errors (Too Short)
Setting your poles too short for a downhill section can hinder your ability to use them effectively. It forces an awkward posture and reduces their shock-absorbing capacity, potentially leading to increased joint strain. Always adjust to the appropriate downhill length.
Correct Pole Length
Ensure your poles are not too short for the downhill grade. If they feel like they are hindering your stride or forcing an unnatural upper body position, adjust them longer. Conversely, on very steep sections, they might need to be shorter than your baseline.
Incorrect Pole Planting (Too Far Forward)
Planting poles too far ahead can cause you to overbalance or can lead to the pole tip catching on an obstacle, potentially causing a fall. Aim for a planting point that is stable and supportive, typically just ahead of your leading foot.
Overgripping and Forearm Strain
As mentioned earlier, a death grip on the handles leads to rapid fatigue in your hands and forearms. This reduces your endurance and can make it harder to react to changing terrain. Remember to use your wrist straps and maintain a relaxed grip.
Over-reliance on Poles Over Footwork
Trekking poles are aids, not replacements for good footwork. Relying too heavily on your poles can lead to neglecting proper foot placement, which is essential for stability and navigating technical terrain. Maintain awareness of your footing and use your poles to enhance, not dictate, your movement.
Adapting Your Technique for Different Downhill Scenarios
Long, Gradual Descents
On long, gradual descents, maintaining a steady rhythm is key. Use a consistent pole plant and stride, focusing on efficiency and conserving energy. Your standard downhill pole length should generally suffice.
Very Steep and Challenging Downhill Grades
For very steep sections, you’ll likely need to shorten your poles further and employ techniques like the double plant. Focus on controlled steps, planting poles firmly, and maintaining a stable, forward-leaning posture.
Adjustments for Uneven Trail Surfaces
When the trail is uneven, use your poles to test the ground and maintain balance. Be prepared to adjust your pole planting on the fly. Poles can help you step over roots or rocks more securely.
Pole Use Considerations with a Loaded Backpack
A heavy backpack can alter your center of gravity and make balance more challenging. You may need to extend your poles slightly longer than usual to compensate for the forward pull of the pack and to provide adequate support. Practice with your loaded pack to find the optimal settings.
Practice Drills to Improve Downhill Pole Technique
Gradual Progression: From Flat Ground to Inclines
Start by practicing pole planting and rhythmic use on flat ground. Once comfortable, move to gentle slopes, then progressively steeper ones. This builds confidence and muscle memory.
Start on Gentle Slopes
Begin practicing your downhill pole techniques on gentle, well-maintained slopes. Focus on rhythm, planting, and body position before tackling more challenging terrain.
Practicing Controlled Step-Downs
Find a small, safe ledge or step. Practice stepping down, using your poles to control your descent and absorb the impact. This drill helps refine your timing and coordination.
Building Downhill Pole Rhythm
Focus on developing a smooth, consistent rhythm between your steps and pole plants. Try to find a cadence that feels natural and sustainable for the terrain.
Testing Adjustments in a Safe Environment
Before a major hike, test your pole length adjustments and grip techniques in a controlled environment, like a local park with some hills. This allows you to fine-tune your setup without the pressure of a challenging trail.
Safety First: Essential Tips for Downhill Trekking Pole Use
Pre-Hike Inspection of Poles
Always inspect your trekking poles before each hike. Check for cracks, secure locking mechanisms, and intact tips. Damaged equipment can fail unexpectedly and lead to injury.
Strategic Pole Placement for Stability
Plant your poles deliberately in stable locations. Avoid planting them where they could snag or slip. Think about where each pole plant will best support your next step.
Inspect Your Poles
Before every hike, perform a quick inspection of your trekking poles. Check that the locks are secure, the shafts are free of cracks, and the tips are in good condition. Ensure they are adjusted to the correct length for the planned terrain.
Pacing Your Descent to Prevent Fatigue and Slips
Don’t rush your descent. Maintain a controlled pace that allows you to react to the terrain and avoid overexertion. Fatigue leads to poor decision-making and an increased risk of slips and falls.